


RIBS GLORIOUS RIBS
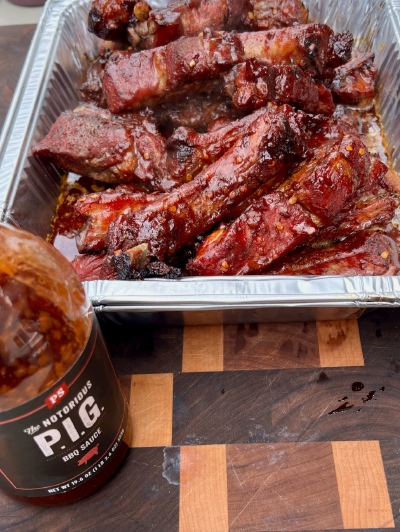
Party Ribs are THE easiest and most flavor packed, simple thing you can offer at a cookout, backyard party, etc. And there are tons of ways to do them. What differentiates one set of party ribs from another is in the rub and the sauce you either use or make. Feel free to use whatever your preference is.
The only caveat in this recipe is the volume of ribs. If you are going to make 2 or 3 racks, then you need to multiply the ingredients by that amount.
SP-arty Ribs
Ingredients
1 Rack – St. Louis Style Ribs
1/2 Cup of Your Favorite Rub
1 Stick of Salted Butter, Cubed
1/3 Cup Dark Brown Sugar (you can use light brown if you want a lighter flavor)
3 Tablespoons of Clover Honey
1 Cup of Your Favorite BBQ Sauce
Instructions
Preheat the smoker to 275 degrees
Remove the membrane from the underside of the ribs and then cut between bones separating into individual ribs. Season the ribs generously on all sides with your rub.
Let the ribs sit at room temperature for 30 minutes minimally, but preferably for an hour, for the rub to really set.
Place directly on the smoker, meat side up for about 90 minutes, until the internal temperature is 170°F (best to use a wireless meat thermometer like Meater or Typher). Flip the ribs every 20 - 30 minutes so that you get an even cook all around.
Transfer the ribs to a large pan such as a disposable foil roasting pan. Add the butter, sugar, and honey. Then add enough BBQ sauce to coat the ribs well, about a cup.
Mix and toss the ribs well to evenly coat. Cover with foil, then place in smoker. Cook an additional 45 minutes or until temperature reads 205°F and then remove from the smoker.
Rest 10 minutes before serving.
I highly recommend these rubs and sauces for your party ribs:
PS Seasoning’s Notorious P.I.G. Rub & Sauce (psseasoning.com)
Duane Paul’s BBQ Sauce (duanepaulbbq.com)
Blazing Star BBQ Pork’n Rub & Seasoning (blazingstarbbq.com)
Remember, when choosing a rub and a sauce, you either want to deliver a spicy punch, a sweet candy type or a layered flavor experience
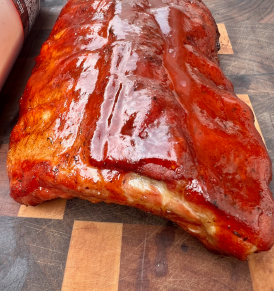
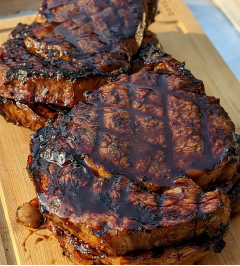
Sean-Patrick’s Hot &aamp; Smoked Candied Baby Backs
The “candied” description refers to the caramelization of the sauce on top which becomes akin to a visit to the candy store! If made correctly, the flavor profile from the sauce, and the caramelization of it, will set your soul on a sweet adventure, balanced by the hot honey underneath!
Ingredients
1 Rack Baby Back Ribs
1/2 Cup Frugoni’s Seasonings TX.SP (Salt & Pepper)
4 Tb Salted Butter
1/2 Cup Light Brown Sugar
1/4 Cup Mike’s Hot Honey
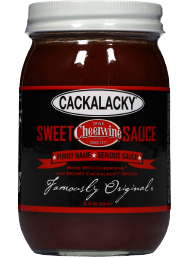
1 1/2 Cup Cackalacky Cheerwine Sweet Sauce
Instructions
Preheat your smoker to 200°F.
Remove the membrane. Rub with Frugoni’s Seasonings TX.SP.
Place the seasoned baby back ribs on the grates of your smoker, meat side up, and smoke for 2 hours. Then remove from the smoker and turn the temperature up to 250°F.
Create an aluminum boat and place the ribs inside. Pour a cup of apple juice over the ribs into the boat and seal the aluminum foil.
Return the ribs to the smoker for another hour.
Remove the ribs from the apple juice bath. Lay out a piece of butcher paper. Put the ribs, meat side up, on top and drizzle Mike’s Hot Honey over the top. Sprinkle brown sugar across and lay on the tabs of butter. Close the butcher paper up and put back in the smoker for an hour.
Then remove, and turn the temperature of the grill up to 350°F.
Brush with Cackalacky Cheerwine Sweet Sauce twice so it creates a decent, but not overpowering layer. Return the ribs to the smoker when it hits 350.
This is the part where the top gets “candied.” Make sure you only leave your ribs on the smoker grill for about 15 minutes. Brush the rack at the 5- and 10-minute marks with a thin layer of the Cackalacky Cheerwine Sweet Sauce. Please note that you should not leave the grill unattended as the sugar from the sauce and juice can burn very easily.
Let the ribs rest for about 15 minutes off the grill. Serve and enjoy!
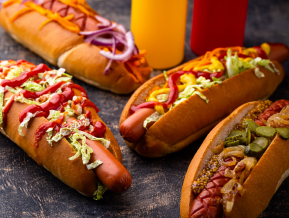
HOT DOGS & SAUSAGES
Everyone loves a great hot dog or sausage, especially at a backyard BBQ. And when it comes grilling them, many overcomplicate it. This is a simple, no-nonsense way to make your favorite dogs and sausages:
For either, start by preheating the grill and creating a two-zone fire with a hot side and a cooler side. To cook hot dogs, place them over the hot side of the grill for searing and browning, then move them to a cooler side to finish cooking through. Watch them closely to prevent burning and rotate them frequently for even cooking and grill marks. The hot dogs are done when they are plumped up and have a slightly burst appearance, and reach an internal temperature of 160°F
With sausages, it’s the opposite where you place the sausages on the cooler side to cook through first (about 8-10 mins to 160°F for pork, 165°F for chicken or turkey), then sear them on the hot side for color and flavor (about 2-3 mins per side). This method helps prevent the sausages from drying out or splitting.
Whether it’s a sausage or a hot dog, remember that toppings and sauces are always the deal maker! Personally, I prefer peppers and onions on top of my sausages. On dogs, I’ll take sauerkraut and McCaffrey’s yellow mustard (mccaffreybrands.com) every day. But remember, you can also be creative with your toppings, too! Be bold and try some new things this summer!
BURGERS AND STEAKS
When it comes to burgers, while I believe in the basics being the best, the truth is that ground brisket will deliver a much better flavor experience. Yes, it has a higher fat content level than traditional ground meat, but for a cookout, it’s off the charts on flavor. Ratcliff Premium Meats (ratcliffpremiummeats.com) sent me a couple of pounds that just blew the doors off most of my normal suppliers. Ratcliff is also who sells NFL Offensive Tackle Trent Brown’s Brown Ranch beef ribeye steaks which are like butter. Ratcliff is currently selling “Trent Brown’s Top Picks Bundle” which includes a flank steak, tri tip steak, 2 ribeye steaks and 6 beef patties for $110. In my opinion, it’s worth every penny and then some!
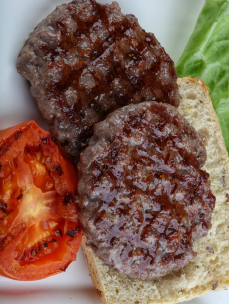
Ground Brisket Burgers
You don’t need to overcomplicate this. Burgers should be simple and let the meat deliver the flavor. Just remember that with a higher fat content, brisket needs to be watched on the grill more closely as they are more prone to burning.
Ingredients
1 1/2 pounds ground brisket
Frugoni’s Seasonings TX.SP (Salt & Pepper), garlic powder
4 slices cheese (optional)
4 hamburger buns, split; toasted
Instructions
Split the meat into 4 equal portions. Hand shape each portion into a 3/4-inch-thick burger and make a depression in the center with your thumb. Season both sides of each burger with salt, pepper and garlic.
Heat a gas grill to high or heat coals in a charcoal grill until they glow bright orange and ash over. Grill the burgers until golden brown and slightly charred, about 3 minutes.
Flip. Cook until golden brown and slightly charred on the second side, 3 – 4 minutes for medium rare or until cooked to desired degree of doneness.
Add the cheese, if using, to the tops of the burgers during the last minute of cooking and top with a cover, close the grill cover, or tent the burgers with aluminum foil to melt the cheese properly.
Sandwich the hot burgers between the toasted buns and serve immediately.
Grilled Ribeye Steaks A true cookout requires steaks. Personally, I have found that ribeye steaks are the most popular in a crowd and you won’t find a better-quality cut than Trent Brown’s Brown Ranch ribeye beef steaks at Ratcliff. When you do have that cookout with ribeyes, here are some simple tips to get your grill on with this cut for a few guests at a time based on 1-inch-thick steaks:
Preheat the grill: Get your grill hot before placing the steaks on it. Aim for a high heat setting, around 450-500°F.
Clean the grates: Clean the grill grates with a grill brush.
Consider two-zone grilling: Many recommend the two-zone grilling method, where one half of the grill is on high heat for searing, and the other half is off for finishing the cooking with indirect heat.
Sear the steaks: Place the ribeye steaks on the hot grill and sear each side for about 2-3 minutes to develop a nice crust.
Finish cooking: After searing, move the steaks to a cooler part of the grill to finish cooking to your desired doneness.
Use a meat thermometer: The best way to determine when your steak is ready is by using a meat thermometer. Most prefer medium-rare which is about 130-140°F and takes roughly 4 – 5 minutes per side.
Don’t overcrowd the grill: Make sure there’s enough space between the steaks on the grill to allow for even cooking.
Resting: Let the steaks rest: Remove the steaks from the grill and let them rest for 5-10 minutes (or longer for thicker steaks) before slicing. This allows the juices to redistribute throughout the meat, making it tender and juicy. Slice against the grain: When slicing, cut across the grain for maximum tenderness.
Now if you are looking for variety, give this one a whirl from my friend, the renowned Chef Andrew Molen who I featured in last month’s Summer & Food issue.
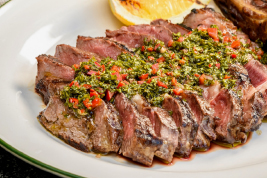
Chef Andrew Molen’s Chimichurri Marinade & Sauce The hardest part of making Chimichurri Steak is not in grilling the steak, but in making sure you get the actual chimichurri sauce done correctly! This recipe makes both an incredible sauce and marinade.
Ingredients
1/2 Cup EVOO
4 Tablespoons Red Wine Vinegar
4 Tablespoons Apple Cider Vinegar
1/2 Cup Parsley Finely Chopped 1/2 Cup Cilantro, Finely Chopped 3-4 Cloves Garlic, Finely Chopped or Minced
6 Sliced Pieces or 1 1/2 Hot Cherry Peppers
3/4 Teaspoon Dried Oregano
4 Tablespoons Lime Juice
1 Teaspoon Coarse Salt Level
1/2 Teaspoon Pepper to Taste
Instructions
Put all ingredients into a food processor. Pulse chop/mix the ingredients until blended, but the cherry peppers are still in chunks. If using as a marinade, immediately.
RECOMMENDED BRANDS:
Aside from the various spices, rubs, meats and sauces you’ve read about in this story, I recommend using the following for your cookouts.
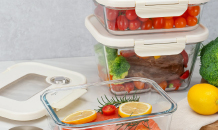
SealVax Auto-Stop Handheld Vacuum Sealer Kit
When it comes to marinating your meats, ribs or cuts, why would you wait overnight? Try SealVax SeasonSeal containers for a faster, more thorough marinade infusion. They were featured in last month’s issue and they have literally changed the way I marinade and preserve my foods! Look for more about them in the September issue for fall harvest foods! Sealvax.com

Kenmore 2-Burner Portable Tabletop Retro Gas Grill This brilliant two-burner small propane gas grill is designed for on-the-go grilling excellence, with 14,000 BTUs of cooking power. With its sleek retro design and tabletop versatility, this small compact BBQ grill not only delivers style but also functionality. You can even take it on a boat like we did for a little cookout (which will be featured in a mid-July IG Reel with Axelband Kitchen!). Kenmore.com
Special thanks to Axelband Kitchen for these finds:
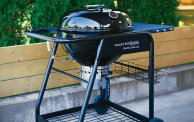
SNS Grills
I used SNS’ MasterKettle Charcoal Grill + Smoker for the first time last month. Brilliantly crafted, I was impressed by its ease of use, and versatility with differentiating heat zones and allowing for smoking in a simple no-nonsense format. After doing some research, I can tell you these guys are a great resource for new and amateur pitmasters alike! SNSGrills.com
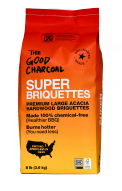
The Good Charcoal Co.
I’ve been a charcoal purist for a long time, so trying something new was not on my radar. But The Good Charcoal blew me away. Their charcoal is made from acacia trees harvested in Namibia, which helps restore grasslands and reduce bush encroachment. It’s also certified by the Forest Stewardship Council (FSC). Their charcoal is made without any chemicals or fillers, ensuring a clean and natural burn. The company aims to provide a healthier and more responsible charcoal alternative. TheGoodCharcoal.com
Enjoy the summer cookouts, my friends.
Until the fall…Bon Appetit!